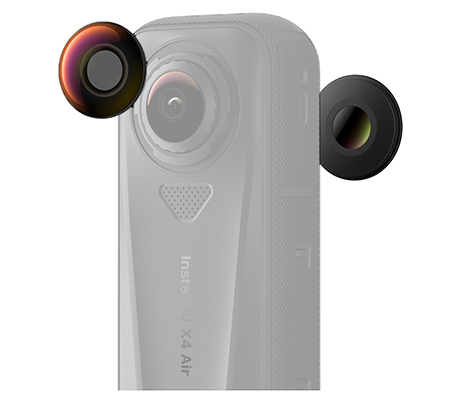
Replacement Lens Kit (Double Lens) Included :
2x Replacement Lenses
1x Lens Grip Tool
1x Lens Blower
2x Lens Cloths
2x Cleaning Wipes
1x Disposable Gloves
1x Removal Tool
1x Brush
1x Lens Replacement Guide
Replacement Lens Kit
Snap, swap, shoot.
*If you replace the lenses yourself using the Replacement Lens Kit and accidental wear or scratches occur, you are entitled to one free lens replacement under warranty.
No stress, no waiting, no limits.
X4 Air's incredible replaceable lens design lets you swap out the damaged lenses by yourself with ease.
*Use this kit in a clean, dust-free indoor environment with less than 60% humidity. For more details, please refer to the instructions and precautions.
Quality guaranteed.
Kit includes one official X4 Air lens, plus all the tools you need to replace and clean it at home.
Clear shots, no compromises.
The replacement lens provides a seamless fit with the same image quality as the original.
For the best image quality, replace the lens according to the guidelines and align the white mark on the lens ring with the mark on the camera. Misalignment may reduce image clarity.
HOW TO USE :
Remove Lens Ring
Align the orange mark on the lens-grip tool with the white mark on the lens ring.
Rotate the lens grip tool twice counterclockwise until the lens ring is loose.
Lift the lens grip tool to remove the lens ring.
Notes:
If the lens ring slips from the lens grip tool, place it back and ensure the orange and white marks are aligned.
Remove Lens
Use the removal tool to gently lift the edge of the old lens and remove it.
Notes:
If the rubber seal around the inner lens corners loose, place it back in its original position before continuing.
Check Lens is Clean
Ensure the inner lens is clean from dust, dirt, or debris. If needed, use the included lens blower, brush, cleaning wipes, and lens cloth to clean it.
Notes:
Clean the inner lens carefully, as dust, dirt, or debris can affect image quality.
Ensure the inner lens is free of any debris before using the cleaning wipes or lens cloth to avoid smudging it.
Use the cleaning wipes quickly after opening them to avoid them drying out.
If any dirt or debris gets stuck or you run into other issues, please contact the official Insta360 customer service team.
Lens Cleaning Steps
Replace Lens
Align the lens ring with the camera and rotate the lens grip tool twice clockwise to install. Remove the suction cup once the lens ring is installed.
Install Lens Ring
Align the lens ring with the camera and rotate the lens grip tool twice clockwise to install. Remove the suction cup once the lens ring is installed.
Notes:
Before installing, ensure the lens ring is securely attached to the lens grip tool.
Before installing, ensure the lens ring is securely attached to the lens grip tool.
If the lens ring slips from the lens grip tool, place it back and ensure the orange and white marks are aligned.
Do not press the lens grip tool down too hard to avoid misalignments.
If the lens ring is misaligned, do not forcefully turn it. Instead, remove it and reinstall.
Use the corresponding lens rings for the front and rear camera lenses.
Install Lens Ring
Align the lens ring with the camera and rotate the lens grip tool twice clockwise to install. Remove the section once the lens ring is installed.
Before reinstalling, ensure the lens ring is securely attached to the lens grip tool.
Notes:
Before installing, ensure the lens ring is securely attached to the lens grip tool.
If the lens ring slips from the lens grip tool, place it back and ensure the orange and white marks are aligned.
Do not press the lens grip tool down too hard to avoid misalignment.
If the lens ring is misaligned, do not forcefully turn it. Instead, remove it and reinstall.
Use the corresponding lens rings for the front and rear camera lenses.
Confirm Installation
The new lens is installed correctly if the lens ring is level with the camera and not misaligned.
If replacing the front lens, the white mark on the lens ring should align with the microphone. If replacing the rear lens, the white mark on the lens ring should align with the center of the wind guard.
After replacing the lens, use the in-camera Stitching Calibration feature in settings.
Notes :
1. Watch the tutorial video and read the instructions carefully. Insta360 is not liable for any damage caused by failure to follow the instructions.
2. This list should only be used to replace scratched lenses caused by minor bumps or knocks. It is not recommended for the following:
Cracked lenses
Deformed lens rings
Non-lens rings or lens grip tool
Badly damaged battery, touchscreen, or other camera components
3. Use this list in the following conditions to keep the camera lenses clean:
Dust-free Environment Use in a clean indoor environment to prevent the lenses from collecting dust.
Low Humidity Low Humidity Avoid using when the humidity is over 60% or outdoor to prevent the lenses from fogging.
If humidity exceeds 60%, use a dehumidifier to remove excess moisture.
4. Place a lens cloth under the camera to avoid scratching the lens.
5. It’s recommended to wear disposable gloves when replacing the lens. Avoid touching the new lens directly with your hands to prevent dirt or marks.
After replacing the lens, use the in-camera Stitching Calibration feature in settings. Swipe down from the top of the camera screen > Tap > Stitching Calibration.
6. If you experience any of the following conditions, do not continue to replace the lens:
Deformed lens ring
Non-lens ring
Non-lens ring thread
Dirt or debris is inside the inner lens that’s hard to clean
Non-lens grip tool


_1.JPG)